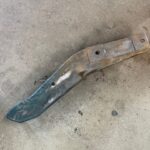
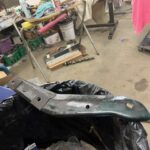
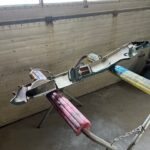
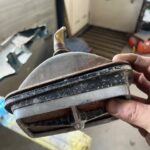
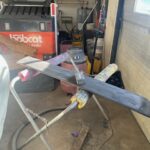
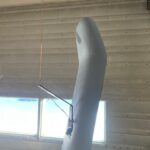
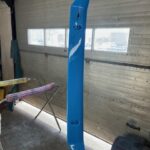
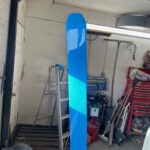
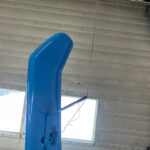
I have had lots of little jobs requiring my attention. To begin with, as I last wrote that I would straighten the rear valance pan out to paint, I realized the amount of pounding with the hammer and dolly and body filler required was quite large so I elected to ordering a used panel from a Cougar shop. It was only $175 plus shipping so this should be the better way to go. In the mean while I need to address the new rear spoiler that comes in a thick black bumpy primer. I had to block sand it out as best I could and shoot primer before painting body color. To make a jig to suspend this spoiler to paint took some thinking and swearing. I eventually used heavy duty Muskie copper fishing line and stranded it through a bracket that allowed for the spoiler not to rest on the line as it hung from an eyelet in the garage ceiling. The only drawback to this method was applying the paint and clear coat evenly to coat the small area blocked by this contraption I rigged up. I know that in the past I was critical of shops painting these rear spoilers and getting poor quality finishes on the back side of the spoiler. I even saw paint runs. I now know what they were dealing with. These cannot be painted one side first and the other side the next day so that it could lay on one side at a time. This is too hard and allows for over spray, plus you don’t want to handle parts that have been cleared for a couple of days to give the paint a chance to harden enough to not accept finger prints and small dents that will occur to even the most careful person.
I also sanded the front gravel guard that fills the area behind the front bumper. It was painted the body color and required sanding and paint prepping. I sanded the back side of it that had surface rust and used the rust conversion spray on it before painting with a Tremclad rust grey color paint. This paint is great for protecting the metal as long as there is a primer of sort applied. The rust inversion spray acts like a primer and allows for paint to be applied. This paint takes 24 hours to dry well enough to not feel sticky. You won’t see it unless you are under the vehicle looking up. I’ll know that it was done and that is what is important to Mr. A.D.D!
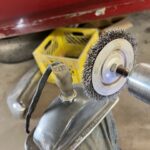
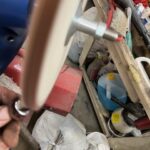
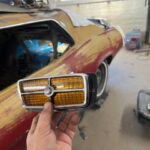
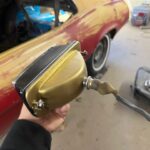
The front bumper arms or supports had to be hit with a wire wheel on a drill. I could have sand blasted them and in a perfect world should have but the glass window from the sandblaster was removed to be used as a template to make new ones. I couldn’t see through the sandblasted glass anyways. Now I have a legitimate excuse for not using that pig of a blaster. These metal parts were primed and painted black and will be ready to put back on the front bumper. The bolts that some shop in the past had used were incorrect. They require chrome button bolts ( these are the chrome circles that you can see protruding on the shiny chrome surface of the bumper where it is attached to brackets) that I had to remove from another Ford bumper that I had. These buttons are stainless steel so they polish up brand new (I put in a photo below polishing one of these buttons although I see that it may be hard to distinguish what I am doing at that time). The front valance pan was taken apart. The turn signal/running lights were taken out and taken apart. I again used the wire wheel on the drill to remove any rust. The plastic lenses were polished with a polishing pad on a drill attachment with a liquid compound so as to not burn the plastic that is being polished. The metal fronts had chrome that was polished with a polishing wheel as well as 0000 steel wool. ( 0000 steel wool is a very useful tool that cleans chrome and stainless parts very well. It also can take overspray off of glass parts without damaging the glass). These had black paint on certain areas that had to be reapplied to make look good again. The back of the lights used to have a zinc cadmium chrome color (goldish color). I used a gold flake paint to paint those parts. Remember, all the bolts associated with these parts being cleaned and restored require the bench grinder to wire wheel clean and then clear coat. This is a timely job but as I wrote earlier saves trying to purchase new bolts, screws, and fasteners that are metal. Zoom in on the finished marker light and see the nuts that hold this assembly to the valance pan once installed. No longer rusty and no longer hard to remove from the thin threaded installed rod.