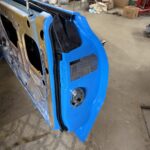
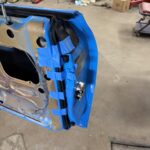
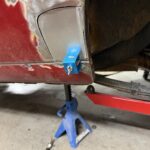
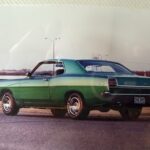
Seeing that I am building this car piece by piece I had the opportunity, nay, the privilege of installing a door weatherstripping on the passenger door. After several restorations I have come to as close to mastering this process as I ever have arming myself with a reducer and a new rag. The glue used to hold this weatherstripping to the door is black in color. Did I mention it is really sticky and relatively hard to clean up excess amounts that seem to squeeze out into visibility of the finished product? This stuff is snot in a tooth paste tube. What I have always used is made by 3 M and should actually have a warning on the tube that it essentially is ‘sticky as snot”. Dry fit the stripping as best as you can. For this car there are screw holes on either end of the stripping that hold the beginning and end into place. Start working from one end, usually the most visible end, and have a roll of painters tape ripped into strips. These will be placed along the way to hold the material in place as the glue sets up. It takes a good 20 minutes to hold but with gravity acting as a way to ruin your gluing plans the tape will help keep it in place. The painters tape I use is not super sticky and comes off later relatively unscathed and is especially important for new painted surfaces. The yellow body shop tape is far too aggressive in its sticking power and can rip new paint off easily. How do I know this? Lets say a big dumb bird told and showed me along the way. I originally said to dry fit this stripping but what I am really concerned about is length. These are aftermarket kits and they are not made the same. I have had some kits that are too long and some that are too short. For the short version you can stretch it somewhat since it is elastic in nature. It just means that more tape will be required to hold into place since it will want to return to its original form. For the long version you will need to remove a chunk and then glue together and glue more on the surface side to hold to the door. The ends with the screw holes should be put in place. If I was removing a piece I would cut a section from underneath where you can’t see it and away from where the piece is screwed. Usually on a flat section and not a curved section of the door. Seems simple? Well that same dumb bird showed me. In a perfect world the kits would be made the exact length. For this Cougar application the strip for the passenger door was perfect. I apply the glue for a 9 inch section at a time and hold in place while I tape it to the bottom of the door to stop it from sagging and pulling away from where it is to stick. When complete there will be excess that has squished towards where it will be seen. Take a glue off product or wax and grease remover and a rag to gently wipe away the excess. It will contaminate the rag quickly so move the rag to a fresh part of the rag with new reducer to stop the old glue you just took off from being transferred to the painted surface or onto the clean new weatherstripping. Remember snot? There is nothing like a clean part of the pant leg. I let the tape stay on until the next day and then remove it. Little additions to a project like weatherstripping and window felts are in my opinion a must. There is nothing that appeases the look of fresh paint than fresh weatherproofing materials. Now when someone opens the door it looks as good as new. What a great way to step into a 56 year old car.
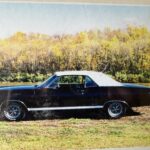
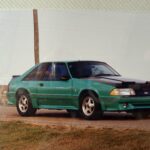
I have been updating this project more frequently as this is the fun part of the build. The car is coming together and most of the hard work so far has been placed into readying parts to be reinstalled. I try to get to those tedious jobs early on when I am motivated and now the motivation is boosted by the thrill of actually making a visible difference after every working session. I had to respray the trunk lid this week. This was the panel that I sprayed on a very cold night and the product I believe did not dry enough between coats. The exhaust fan I use sucked the heat out of the room that the panel was painted in and replaced it with very cold air. I did not pick up on this and did not increase my drying time between coats. There were solvent pops along the top of the trunk lid. I had to sand the entire top of the trunk lid with 400, then 800, and then I used a red scotchbrite pad to lightly scuff the whole area again to allow for mechanical adhesion of the next two coats of base and three coats of clear. The respray cost me at least $150 in product and a whole night but it turned out better than it was originally. When first sprayed I used a can of epoxy primer that did not spray well either. It may have been a combination of errors but you have to account for this. Do not think that professional painters never run into problems. They spray a vehicle one day perfectly to have paint issues from the same booth a day later. These are chemicals in action, humidity it action, temperatures in action, and the like. For the quality I am going for I am not worried about the lack of a paint booth. It does help limit some extraneous variables and a heated booth would have been helpful on that cold night I screwed up the trunk lid, but I am not a body shop. I just try to do body work and paint in my shop! Some of my cars that I did in the past that were sprayed in their entirety and not piece by piece, still were not done in a booth. They were sprayed in a large open shop using fans to direct air out of the shop for ventilation. They came out clean. They came out clean enough that no one ever knew that a booth was not used (see photos of 66 Comet convertible, 69 Fairlane, 87 Mustang Cobra (photos of a photo from an album). All three of the cars I sprayed this way were single stage paints. They were single stage paints so no clear coat was needed to make them shine. This was the way they were sprayed when new. There was no base/clear system being used on these cars. I just like the versatility of fixing errors when using base/clear paints. I can wet sand the majority of boo boos out of the surface provided I have a thick enough coating of clear. Over time the amount of boo boos diminish as my skill set improves………typically muscle memory for how I spray. You require consistency of the speed and technique for overlapping coats which determines the chance of runs.
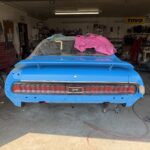
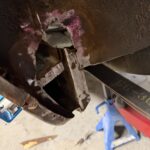
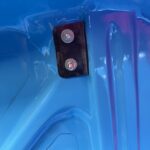
In the gallery I show photos of the trunk lid back on with the spoiler intact. In order to secure the rear spoiler securely and not placing stress the the metal of the trunk lid I made inner plates to secure where the two bolts from each arm of the spoiler go through the trunk lid. Without an inner structure you cannot over torque the nuts to hold the spoiler from vibrating and moving. If too tight the metal around the spoiler will suck down from stress showing like a sore thumb. This is the same problem for hood scoops. Guys will tighten only so much and then have to check the nuts tightness each years since driving vibrations may loosten the nuts and invariably the spoiler. We started cutting rust out of the quarter panel and fitting in a piece. I had to clean out areas of inner structure rust with a wire wheel and coated with my rust conversion spray.