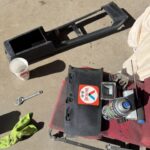
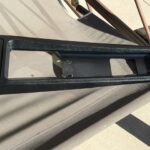
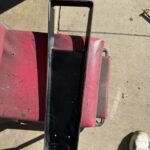
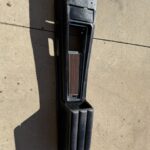
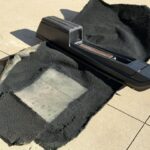
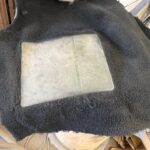
Yes I have left this big piece of the puzzle needing refurbishing for the last eleven months. I don’t have a great reason for leaving the console, that sits on top of the shifter on the floor and between the two front bucket seats, other than it is yet another job requiring tear down and painting. I have a console out of the parts car Cougar and I liked the arm rest cover for the closed compartment better. There was a higher option lid and this is that . It had wear on most of the surface from years of sunlight and elbow sweat so I sprayed a texture spray on it to bring back some of the texture details of the cover. There were several screws needing removal for this console to come apart. Each piece was washed with my pressure washer and then cleaned with lacquer thinner before applying the black shiny vinyl and plastic paint. The chrome tape on the outlines of some of the pieces were in decent condition so I cleaned them with 0000 steel wool and masked that portion off before painting. There were several screws and each had a different length for where they went. Within a day I had forgotten where each one went. I had to refer to the other console I had to check. This is one of my rules that I broke. Make a map of where each screw goes. Stick the screws into cardboard and mark what it was for. I just figured that I could remember. No not at all true anymore. Some of the screws could only fit in one place and they were easy to figure out….but others were only a bit shorter or longer or thicker than each other. To make things worse the parts console had different screws put into it over it’s life so I couldn’t get a good read on what was right. Not to worry because it is together again and no one is the wiser.
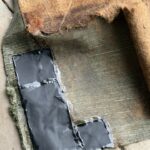
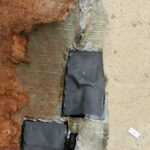
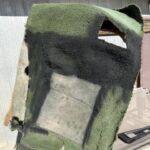
Now I am going to re-visit my past writing about the carpet problems I was having with increased shipping costs. The carpet I was ordering from Rock Auto had gone up yet again so much that now that the cost of shipping is $2 more than the carpet itself. I just can’t give in to this injustice and I won’t buy a new set. Here is what I did. It might appear to be butchery but it is butchery for a good cause…….my pride and sanity and obviously my wallet! I took the front carpet which was green in color out of the parts car and the rear carpet out of the subject car. There were rips in both of them so I began with vacuuming them, using a carpet extractor on them and letting them dry. I used a glue called Goop and reinforced the plastic backing of the carpet set with it and with some vinyl material. It used a good two tubes of this Goop but it hardens right up and holds the weaker carpet together. Now for the front carpet section, it always fails where there is the most traffic, so the worst was the driver’s side. I cut out a piece of carpet out of one of my T bird parts cars in a rectangular shape. It had the same pile look but was brown in color. I sewed it over top of the carpet on the left side of the mat that is sewn into the floor from factory. I had stitched it with thread that does not break. It took some time but I sewed this piece over top of the old carpet and then removed the excess when finished. Now I used black vinyl spray die to coat the green and brown carpet to be a consistent black color. The back carpet was already black and I could spray that if I need to freshen up the color. You have to look very closely to see where the carpet was sewn into place. NO ONE will know except for you the readers of this confession. I am here to tell you that not only will no one notice that this was done, the amount of carpet showing after the console is installed, after the door sill covers are installed, after the seats are installed, and after I put black mats on the floor over top of my beautiful carpet…….there won’t be much carpet to even see! Six Hundred Dollars! That is what I have dodged. This carpet already had the holes put into it for the seat belts, the headlight floor dimmer switch, the console screws, the seats, and the floor shifter. That is a major savings in time and effort when re installing. By the time I put my own blue skin covering on the metal floors and my own carpet underlay, this floor will look and feel fresh and new. I have long come the realization that if I wished to save as many cars from their lonely existences sitting in fields and barns, or sitting in someone’s garage for years upon years waiting for the chance to shine and drive again, than something has to give. It is too expensive to buy everything new for these cars. If I was only doing one car for myself……that would be a different story and I could splurge for the carpet price. Get your vehicle on the road any way you can financially see fit. It is getting rough out there. I am trying to keep this hobby going but I am being forced to make some considerations at every level of my builds. In the past I could have rebuilt the entire engine with oversized pistons and done the whole works. This time around I elected to cleaning the cylinders with a hone and putting in new rings, rod and crank bearings and cleaning the heads up. The engine will run just as well for what I am doing with it. The difference in cost is astounding. This car will still be driving well down the road without a total engine build….and now without a brand new carpet!