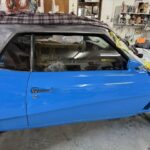
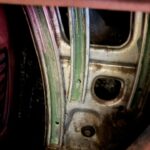
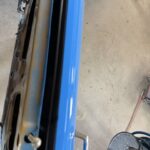
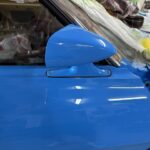
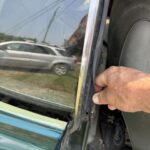
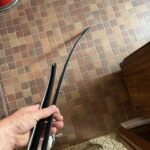
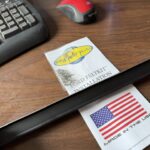
I wanted to show the slow but necessary continuation of my project Cougar. It may not look like a lot has been done but that is not the case. Now that the door was completely painted we needed to hang it back on the car. Before we took the door off we drilled pilot holes in the top and bottom hinges that would be used to line up the door exactly the way we had it when it was aligned before paint. All we had to do is slide a nail through each hole until they slid through into the body mounts for the door. We installed the glass in the rear quarter. I had degreased the slider mechanism responsible for sliding the back window up and down. It should glide gracefully if cleaned and greased again. All the old dust and grime that accumulates over 50 years of use on the factory greased parts had to come off. I used my parts washer to take off most of this material with help of a scratchy brush. I applied mechanics grease to the channels and the roller wheels. In all fairness the amount of dust that will enter this car in the future will be minimal since I doubt I will be driving it down gravel or dirt roads. Many restorers swear by white lithium grease as it does not easily hold dust. I like the fluidity of the mechanics grease to lube the best. Before we installed this slider mechanism we coated the inside of the quarter panel with seam sealer and when it was dry the next day we coated it all with gravel guard. I doubt it had this much coverage on the inner structure from brand new. I believe in doing the most that one can to eliminate the temptation of rust……especially from a place that will be out of reach and out of sight. With the slider installed we placed the glass into the channel. This was glued into the channel from factory but had come loose over the years. Once it is lined up properly we will use urethane to re attach this glass to the track. The quarter glass I used was the original one for this car. It had scratches on the surface from sliding up and down against sand that had crusted itself into the cat hairs that are there to gently glide the glass up and down as well as keep most moisture out of the inside quarter panel below. Here is decision making 101 for you. The glass in my parts car is clearer and in better shape….except for the rubber gasket that is glued into position on the side of the glass where it would mate with the front door window (see photo). The rubber on my original glass has a couple cuts that look almost factory but it is not torn as the parts car glass is. To remove this rubber is not easy to do without ruining the rubber. I could source a new one and fight with it but I decided to live with the rubber that I have on the original glass. As for the scratches, in the past, I have used a glass polish wheel that used rodite powder mixed with water into a paste to polish scratches to a minimum. A felt wheel soaked overnight in water is used on a drill to polish with lower heat. I haven’t done this yet but this is a future Darron problem. The rubber on the side of the glass is also a future Darron problem. I replaced the cat hairs (felt like material molded into plastic and metal ( see photo) on the quarter glass area and the passenger door to allow the glass to slide carefully up and down without scratching. These parts are from a company called Re Pops (see photo). They include the felt trim that lines the door panel to sandwich the glass from the inside door panel so that the glass has an inner and outer cat tail to ride against. These on the inner panel are metal stapled to the door panel while the outer cat hairs have push pins that align with factory holes like the original cat tails. I don’t know anyone with a metal grade stapler to re staple the inner cat tail to the door panel. These I have done in the past and have swore, stomped my feet, and swore again….and I am not using pleasant words when swearing. To emulate a stapler because they include the staples in the kit I would have to drill tiny holes through the cat tail and through the door panel and use pliers to pinch them shut. Not easy! This is a future Darron problem…..maybe even a future Darron’s future Darron’s problem (see photo). The kit includes instructions and a link to a “Feeling Stressed Out” help line. I moved on to the mirror which was fun in itself. I can’t remember if I wrote about the absense of a mirror on the passenger door but Eliminators have a sport bullet mirror on both sides. A 1970 Torino mirror works but needs to be selectively placed on the door in the right spot. The drivers side has a pedestal that is used to guide where to put the threaded inserts for the two screws to hold the mirror down, The passenger door was never designed initially for a mirror so you have to place the mirror and mark where to put the holes for the inserts for the mirror. This was done before I painted the door. I had to purchase a proper gasket for the mirror to fit the door. It is 1 mm away either up or down from looking wrong so one has to be patient and try to fit not only the mirror leg but the wider black plastic gasket that I had ordered. A threaded insert tool is a necessary tool for any restoration. All of this represents quite a bit of time involved. For people wondering how a restoration can cost well over $100,000….well this is how. Body shops do not want to involve themselves with this type of work because it is hard to explain the time required for a good overall result. This is why I feel the new generation of restorations will be done as I am showing here. The car owner better find handy friends or become handy themselves in order to get a project on the road. The talent pool is diminishing and the old guard are getting older. Old vehicle knowledge is a dying art. I have been a privy to many restorations and I get stumped continually. There are always supply problems, mechanical problems, and the like that present themselves that are beyond my scope. I have to rely on other individuals with uniquely special talents to help me achieve my goal. The vehicles that I have chosen to build are getting older by the day and they require more work than ever before to reverse the signs of aging. Is it worth it? I think so but know this……if I win a lottery I am going shopping for completed projects and skip this fun. And trust me there are a lot of vehicles on my wish list. As Stan Lee would conclude….Nuff Said!