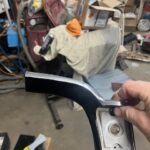
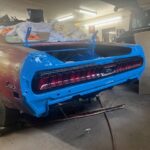
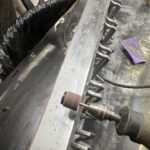
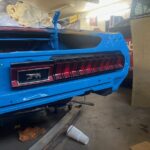
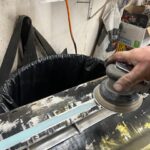
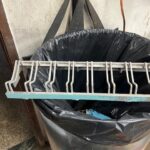
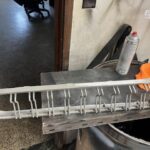
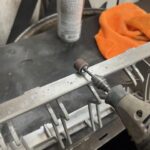
So a continuation of the back of the vehicle. I am ticking off my list the things that are tedious and time consuming. You have to be in the right mind set and not suffering too much from ADHD to accomplish some of these tasks. I took the first tail light apart to separate the metal chromed frontage of the light. It is now time to take it to the sand blaster. Sand blasting does not remover the chrome coating but it dulls the shine of it giving the surface some grit for the paint and primer to stick. There are thin areas that would be hard to sand aggressively so the blasting is the easiest way. After an hour I exit my sandblast area looking like a potato farmer at harvest time with sand dust covering my upper body. The sand dust is still leaking from the holes in the gloves…..and yes I ordered a pair but still has not arrived. Note to self and all: wear a breathing mask. This took just over an hour. I do only one tail light at a time to give my back a rest from bending over the stand up sand blaster to peer through an opaque sandblasted window, to see what I have or have not accomplished for the last hour. The old chrome on this piece has started to bubble so with dremel tool in hand and a mini sand drum I level off the bubbles exposing the places where the chrome coating had let loose from the substrate metal. You can feel the depressions with your finger so a light coat of prep putty had to be applied and sanded away to leave these mini craters filled flat. Without doing this step the areas will show up when painted. I now will pre-clean this part with glass cleaner or wax and grease remover and prime the piece with a couple of coats of primer. When this has dried after a couple of hours I use an etch pad to scuff the primed surface to make paint adhere properly and then paint this with a semi gloss black paint. I leave this to dry over night as to not transfer fingerprints to the soft new paint. With window cleaner in hand I clean the openings where the bulbs are inserted from dust and debris from 55 years of wear. With one light complete I install it in the taillight panel. This is a motivational action that I use to keep me focused on the prize of completion. I still have another tail light that requires the same procedure. The gas door lies between the two taillights. The emblem on this door for a regular Cougar is a Mercury symbol but on an Eliminator it is a chrome Cougar cat. This emblem is also on the front of the hood. I have a broken section from the original hood with a good cat emblem. It is attached at the factory with a press on rivet. I grind the back of the plate that it is attached with a mini grinding disk to ‘release the cat’ so to speak. The gas door can be taken apart and the red plastics can be polished. There is a white tin area around the emblem that need to be painted black and once dry the cat emblem is glued into proper position. I now install this into position and continue on with the last taillight. There are chrome pieces that require black paint as well. These are attached to the quarter panel in the extension caps. They encompass the reverse light on each side. I prep and paint the two of them and put away for a later date. The gas tank is put back into place and reconnected with the extension tube that I already cleaned and clear coated earlier. I use a dremel with a small wire wheel to clean all of the bulb holders from light corrosion. I clean the contacts with a smaller wire dremel brush to make sure the bulbs will get good contact. All bulbs and wiring are placed back in to the proper place. I test each bulb and replace bad bulbs as needed. Next on my list to accomplish is straightening the rear valance panel and eventually painting.