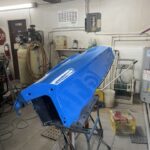
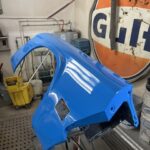
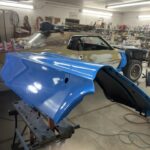
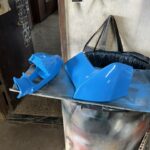
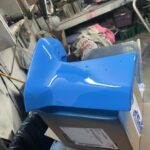
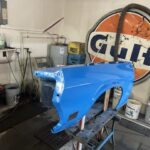
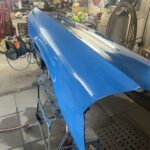
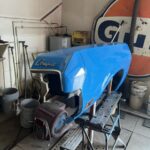
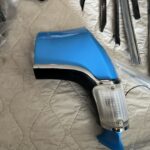
So I haven’t been asleep at the wheel these past few weeks. I actually have been progressing along with finishing the front two fenders and installing the painted end caps including the chrome trim that has to be attached. Sounds easy right? Not so much. Upon painting one of my fenders the base coat can spit bright blue spots out of the nozzle in a circular pattern. I have never had this happen to me before out of any of my base cans. Was it the relative humidity to blame? Could it be the warm temperature? Maybe it was a bad can with a failed product. I opened a second spray can and guess what? It did the same thing again but in a different spot and a different spray pattern. I had to wet sand with 1500 grit once that coat was dry to take the high spots of the drops. After sanding I wiped the area down with glass cleaner. I was surprised at how much overspray was collected on the rag. I used my tack cloth to lightly go over the rest of the fender and it became bright blue with color. So this was material that didn’t meld into the base on the fender. I now cleaned the whole fender with a new high fiber cloth and glass cleaner. I have never done this before. I now would apply three coats of clear coat. On my third coat I was running short on clear. The can spraying more air than material and the top of the fender looked light on the clear to meld (flow) properly. I looked over my shoulder to see my 3/4 full can of clear from the last fender five days ago that I keep in a cooler to extend the life of its contents. Usually I will use this older clear for smaller jobs like inside door jams or for clearing metal parts because the cost of the clear is getting ridiculous. I didn’t want to open another new can since usually two cans is more than enough for a fender so I chanced the third older clear can and used it just to finish off the top of the fender. This too is new to me and I have never done it as a test before. I got a drip of clear that leaked out of the nozzle onto my relatively perfect clear job. Yep, just leave it alone my inner voice was saying over and over to me before I pushed the trigger on that third can of older possibly faulty clear. This job of how well the clear flowed was likely near the top of my jobs that I have done. I have likley unlocked another step in this process of wiping down the base coat once dry before clearing. For the droplet of clear I can remedy with wet sanding and polishing so I am not worried. The spots of blue base still show up through the clear which is unfortunate, but hard to see when outside in the natural light. Everything looks worse under florescent lights.
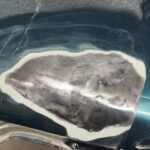
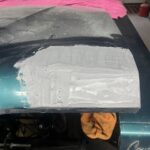
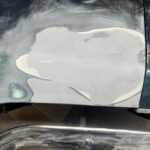
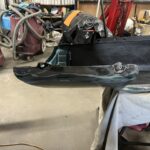
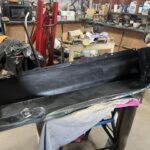
The trim piece that goes on the front of the fender end cap was tricky to install. It has three holes in the end cap set up for three clip that slides into the chrome piece. These pieces are always it seems a bit bent from being installed and disassembled over the years. The clips are a special width and usually rusty and losing their wire that helps hold them in place under tension. I had to make a couple of clips that had long enough bolt ends to feed through the end cap and bold tightly from the inside. One piece took me close to two hours of installing and re installing until I found the proper position of the chrome piece. If installed a bit too high and the chrome piece hangs on one side too low. It totally matters how the clip is installed as to how it wants to pull down the chrome trim when tightened. Inside of the fenders at the front are plastic guards that have to be cleaned and installed. One had a whole punched through by a flying rock so I had to fire up the plastic welder and repair it before installing it back again. The marker lights were installed as well. It is nice to finally get parts that have been prepared to install finally get installed and off my storage table. The next step for me is repairing the hood damage on the hood that I am using from the parts car. There are a couple of photos of this. I am doing what many in the restoration trades say is a no no. I am repairing an area and adding my own body material joining old material that has been on this hood for likely 25 years. In a perfect world I would strip the hood to bare metal and start fresh but the process of stripping the old material causes heat and possibly warping of the panel. In the old days liquid stripper could be applied and with minutes the sound of popcorn popping could be heard as well as smoke coming off the panel as the stripper did its job. Not anymore. The new environmental chemicals have been changed as to not be so toxic and now couldn’t strip bird shit let alone paint and body putty. This puts spaghetti wheels on a high speed grinder to strip and these cause heat. In my view, this hood is sealed with old paint and it is holding on except for this one spot where there was original damage to the hood. The body work on the whole hood before its last paint job was quite straight so I am just going to wet sand with 400 grit and paint. I will fix where it had failed with everglass putty and then body putty and then prime, sand and paint. If it fails, I will fix it again. Where do you decide enough is enough. In a perfect world I would find a mint original hood with no damage and use that. I might even strip the hood as mentioned and add many hours and dollars into an already expensive project to make the hood possibly worse than it is if I leave the majority of it alone. I will chance it. I can maybe find a better hood in the future but I doubt I will need to worry about this. This car will not be driven down rough gravel roads shaking the very structures and testing the bond between bodywork and metal. This car is not a trailer queen and I never will build a trailer queen again. I want driver quality and the reality is that these cars see very limited driving. My greet T bird I drive daily originally was painted around the same time as this parts car was painted. I used the majority of the panels as they came by sanding and painting. Now five years later some of the old bodywork is popping at the bottom of the doors. When it gets bad enough I will grind down and repair and do a blend paint job. You will not tell and if you can I won’t care anyways. This is a car that sees 2000-3000 miles per summer and has for the last five years. I have seen cars restored in much more expensive ways and had nice paint jobs that are also rusting in the most common areas already. Your paint and body job is always the best the first day out of the shop. The timer has now started and eventually it too will fail. Metal rusts. Rust in metal is hard to see especially when it starts from the inside to the outside. When that happens even the best body man will miss it.
There are always so many little jobs needing my attention while working on these panels that I fail to mention but do require mentioning in that I seem to have to do some derivation of these tasks to every project car. For example, that spot on the bottom of the fenders where usually two bolts go through to fasten the fender tightly to the body always either rust, break, or break from rust. The clip and bolt combination are under duress of water from the road over the years and rust together. When a person tries to loosen these bolts they bend the metal and or break. Sure spray penetration fluid on them might help but usually I am creating a piece to weld in to replace the broken hole. Also, the second fender needed the back side wire wheeled to clean off loose rust and undercoating and then prepped with a rust mort product and then gravel guarded a couple of coats. I think I went through this on one fender before in a previous write up but just note that it needed to be done on the second fender. Just like the inner door structure and inner back seat area they need re coating. These cars will not be left outside to the elements once finished so the only water I am worried about reaching the inner structures through the felt against the side windows is from washing the car, or from being caught in a freak storm which I doubt will happen often.