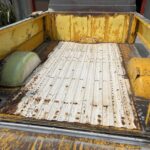
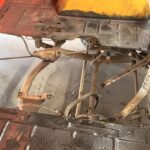
So in no particular order some of the jobs that had to be done to this truck will be explained. I am likely forgetting lots of job done as I did not photograph everything but from memory here are some things I can recall. From last episode I explained the bonus of getting the floors cut out of our parts van so that we could use them to cover our warped floor in the truck. These were welded into place, wire wheeled the edges and sanded the old white paint with 80 grit to allow for bed liner liquid to stick properly when sprayed on in the near future. The bare metal was primed with epoxy primer.
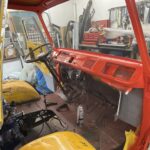
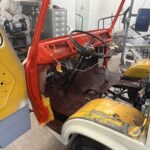
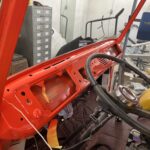
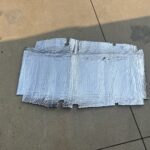
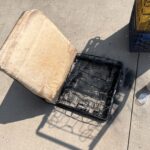
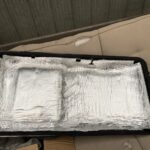
The interior of the truck needed to be painted and I chose to do it a two tone with the color of the truck (Calypso Coral) being the main color and white being the secondary color. I did this in sections and on different days. It is hard to crouch in the interior and sand the panels and prepare for paint….especially when you aren’t 30 years old anymore. There were several joiner sections that allowed me to paint in this way so that if I needed to paint a different adjacent panel the next week I could just mask and tape over the good areas to stop overspray from hitting the new surface. This reduced the amount of paint fumes in my shop. Even though I wear a mask the smell takes forever to dissapate. The dash area required some body work to fill small dents from years of use. The dog house that covers the engine was also attended to. This was taken out of the vehicle in several large pieces that would bolt back together when the new engine was installed. This would be painted a black pearl. I had to sand these large pieces and prime before painting. These panels sat over a year before I needed to install them, but at least they were done. I like doing this to all the small jobs that need to be done at some point. Get them done if you have a place to store painted pieces without harming the surface. I bought a silver mat heat resistant material off of Amazon to cover the inside lid and interior of the dog house for noise and heat concerns. There are many options for this material but some are extremely expensive. I payed $60 for the material that I required for this task. The photos are not all in order but you can see the material cut out for the lid and then the finished result a bit further down in the photo gallery. Also around this time I rebuilt the steering wheel by filling in cracks in the wheel with fiberglass liquid. It is just a process of cleaning the crack, making it a bit bigger with a wire wheel on a dremel tool, and then dripping in the liquid fiberglass and hardener into the area. This took three or four attempts to completely fill the cracks and then sand smooth before primer and paint. Every steering wheel of this age is cracked. I am sure someone has a NOS one for sale for a ton of money, but reality sets in and you do what you have to for a decent result.
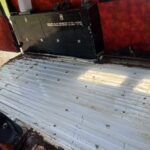
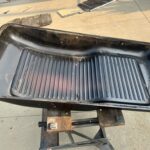
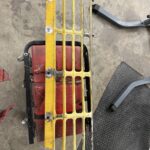
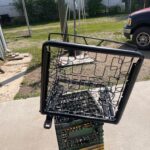
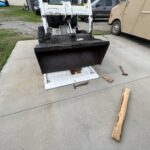
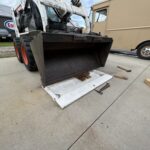
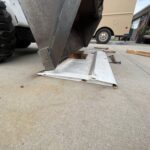
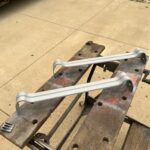
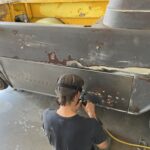
I took my seats to my upholsterer for him to strip off the guts and leave the frames. I took the frames and sanded as well as sand blast where needed to remove rust from the metal. They were painted and returned to the upholsterer to recover my seats. The front grill from the truck was sanded to metal and body work done to dents. After I purchased my parts van I found that it had a better condition grill….but the work had already been done so now I have a spare. The tail gate was warped outwards from heavy loads being placed on an open gate. We used my Bob Cat skid steer and blocks of wood to stretch the metal back into a better shape before complete metal stripping was done with 80 grit on D/A sander (dual action). It would have been hard to press this back without the skid steer. Lower panels were welded into position by Kyle. He has way more experience than I have fabricating metal. He later rebuilds the rear gate where they normally rust out at the bottom from stress and design flaws, not to mention 57 years of age.
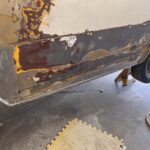
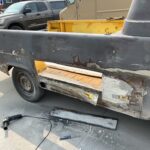
When I started this project I had ordered most of the metal that I needed like the lower quarter panels and the wrap around panels for the back left and right side. They weren’t perfect but could be made to fit. Now the companies are out of stock and I am not sure it is in their best interest to re make more of the panels since there are fewer and fewer of these vehicles being restored…let alone being found in decent condition to even tackle a restoration. Just to note: I attempted to purchase a fibergass dual scoop 67 427 Fairlane hood from the USA for a 1967 Fairlane XL project I have in the waiting. There were two companies making them in the past. One company sold out years ago and the last one quit making hoods just before Christmas. As of right now the owners are still trying to sell their business including all their fibergass molds and equipment with no buyers in sight. They were responsible for fiberglass fenders, hoods, bumpers, etc for all types of older vehicles. Who will take up the slack now? The price of that hood I wanted was $600 USD not counting shipping. Now a Canadian company makes this hood for the low price of $2200 CAN not counting shipping. I guess I will use my factory hood!