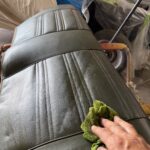
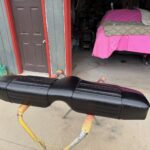
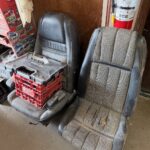
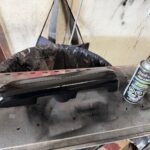
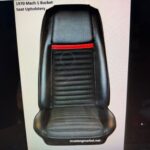
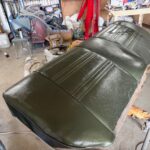
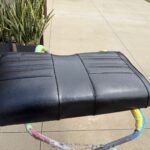
I have been putting off this section of the build because it is expensive and painful to get information on what to order. This car originally came with a seat pattern and material called Houndstooth. The vinyl top was houndstooth as well as the interior seats inner pieces. It looks really cool and I really wanted to have this again but the drivers seat in the car had been switched out from houndstooth to standard high back. The back seats were in workable condition with the exception of where the sun had beaten down and disintegrated the material such that cleaning it was not possible. I found houndstooth material on ETSY and ordered two yards only to find that the pattern was the same but a bit larger. This would mean that I would have to have all the material replaced and this doesn’t even account for the drivers seat that isn’t the same at all (see photo) and would require an entire seat to be made. I decided to order the front bucket and rear seat entire upholstery ready to make fit. The gentleman at the company selling these did not think I had the right bucket seat to fit this cover. I researched at my end and I was convinced that all 1970 Mustang and cougar bucket seats were identical other than the difference of a 1969 vs a 1970 seat having the rear seat retractor in a different location. My handles to make the seat fold forward to let someone into the back seat was near the bottom of the back rest. A 1969 had this handle more in the middle of the seat back. Believe it or not this houndstooth was the most expensive seat cover they offered for $1500 USD for the entire set. I couldn’t chance ordering it, paying for shipping to the border, and then brokering it into Canada plus paying the credit card change for US currency. After shipping these seat covers would cost me $2500 and I still haven’t had them installed onto the seat. I can only hope that the foam wasn’t entirely dried out and broken because that would be another $500 for the front two seats in foam. You can see how out of hand this can get. On one hand I have a want and on the other hand I have the practicality of making this project not cost more than it needs to be. Let’s not forget that this car is not a true Eliminator. It is a visual representation of one. It is a car that will make me feel happy when driving. Would the houndstooth pattern be over the top cool? Absolutely! Do I want to pay a ton of money for that kind of cool? NOPE! So here is what I decided to do, I ordered front seat covers for a 1970 Mustang Mach 1 and ordered them specially with a red stripe through the top portion. This will look good considering I have red traction bars on the car against the grabber blue paint color. The 1970 Mach 1 normally has a grey stripe and the 1969 has the red stripe. I needed to order the 1970 seat to match my seat back release lever and had them put a red stripe in it instead of grey. This was an option on their web site. To pay for these products you have to phone in because their pay online service is disabled on purpose. The owners could not keep up with the monthly price hikes from the manufacturers of these products. In fact, I ordered seats and door panels for my 67 Fairlane build because of the price hike going up again after August. The difference in price for what I ordered today from what was listed on the website was $700 USD. These kits take at least 10 weeks to get made and then sent to me at the border. The 1970 front bucket upholstery I ordered was considerably cheaper. I also did not order anything for the back seat…….here’s why. The seats in my parts car are in decent condition but are green in color. I cleaned them with Fantastic cleaner and used a circular brush on my cordelss drill to massage any dirt out of the material. There was a small tear on the top of the seat the I used glue to patch and then proceeded to wipe the panel down with healty amount of lacquer thinner. This softens up the material to allow the paint to seat better and stick better. In the past if paint wears away from use, I can just freshen up the area with more out of the aerosol can. I was using Duplicolor gloss black interior paint from that Canadian maned store I was griping about. The price per can went from $14.99 to $25.99 and I would need at least two cans to do the entire seat with two coats. I also started spraying other interior parts with the same paint like the molded vinyl covered door handle and some side pinch trim. It will be good when these are ready to install later in the build. By using my own seats material for the back and painting it instead of putting new material on it saved a ton. I like the Mach I seats anyways (see photo) because they are comfortable with the comfort weave inserts. My interior in the green t bird was painted five years ago and I use that car a ton. Sure I touch up areas on the seats that get the most use once a season but that is a far cry from new seat material. I might recover the thin wood like material on the window tray at the back with the houndstooth material I had purchased. That is the beauty of doing a creation not entirely factory. Factory usually means expensive.
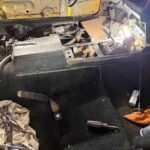
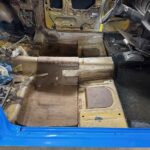
I took the console out of the interior so that I could remove the carpet. This carped wasn’t all that bad. I had to put a small piece where it had worn on one spot and will soon carpet clean with my carpet extractor. It is black which is easy to patch stains and such with carpet dye/paint. The piece I installed was brown but a couple of squirts later it is black. Carpet sets aren’t that expensive but they are a pain installing. They also aren’t the same quality as the original so if the original is in decent condition I will use it and all the holes for the seatbelts, console, and the like are already in the correct spot. I usually put larger rubber floor mats to protect the carpet anyways which reduces the amount of carpet to be seen. This will save me $300 and a bunch of time and will still look decent. I would rather make sure the door panels, kick panels, etc are all looking their best.
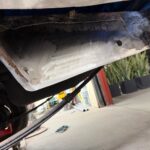
I included one photo of the work we are doing on the back quarter panel.
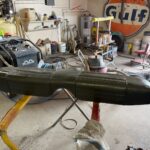
The trunk drop down in installed ready to mated to the outer shell.